Step-by-Step: How to Install Peel-and-Stick Backsplash ?
The modern kitchen is no longer just a place to cook; it’s a canvas for your creativity and style. Peel-and-stick tiles have revolutionized how we think about kitchen makeovers, eliminating the need for grout, intense labor, or professional installation. These versatile, adhesive-backed tiles are perfect for those who wish to update their backsplash with minimal hassle. If you’re ready to embark on the journey of transforming your kitchen walls, let’s dive into this comprehensive guide that ensures your DIY adventure is both fulfilling and flawless.
Choosing the Right Peel-and-Stick Tiles
Before you lift a finger, selecting the ideal tile type for your kitchen is essential. Available in various textures, patterns, and colors, peel-and-stick tiles can cater to any aesthetic preference.
1. Understand Your Aesthetic:
Your first step is to envision the style you desire. Are you aiming for a minimalist white theme or something more modern with a pop of color? Ensure your chosen tiles align with the room’s overall feel.
2. Material Matters:
Peel-and-stick tiles come in vinyl, metal, glass, and more. Each material offers a unique finish and durability, so consider where in the kitchen you’ll be applying them. For areas prone to splashes, water-resistant materials are advisable.
3. Measure Your Space:
Accurate measurements are critical. Take note of the backsplash dimensions to ensure you purchase an adequate amount of tiles. Remember, it’s better to have a little extra than to fall short.
Selecting the right tiles is a vital first step, setting the foundation for a seamless installation ahead.
Preparing the Surface for Installation
Preparation is the heart of a successful peel-and-stick tile installation. Ensuring the wall is ready will guarantee the adhesive works effectively and that the tiles will stick securely.
1. Clean the Surface:
Start by thoroughly cleaning the backsplash area. Use a mix of water and a mild detergent to remove grease, grime, or previous adhesive residues. A clean surface allows maximum adhesion, ensuring the tiles will stay in place for years.
2. Level the Wall:
Examine the wall for any uneven areas. Use a spatula to fill in any holes or cracks with spackle. This not only creates a flat surface but also ensures the tiles adhere properly.
3. Dry the Area Completely:
After cleaning, allow the wall to dry entirely. Moisture is the enemy of adhesive, so make sure every drop of water evaporates before moving forward.
4. Assess the Surface Type:
Smooth, non-porous surfaces are ideal for peel-and-stick tiles. If your wall has texture, consider a primer coat to create a suitable base for the tiles to adhere to.
By dedicating time to surface preparation, you’re setting the stage for a successful, long-lasting installation. {image_content}
Installing Peel-and-Stick Tiles with Precision
With your tiles chosen and surface prepped, it’s time to bring your kitchen vision to life through installation. Here’s how you can ensure every tile fits perfectly into place.
1. Plan Your Layout:
Lay out your tiles on the floor or a large table to visualize placement. This helps prevent misalignment and ensures a cohesive pattern.
2. Start from the Center:
Begin placing tiles from the center of the backsplash area, working outward. This ensures a symmetrical design, especially around focal points like the stove.
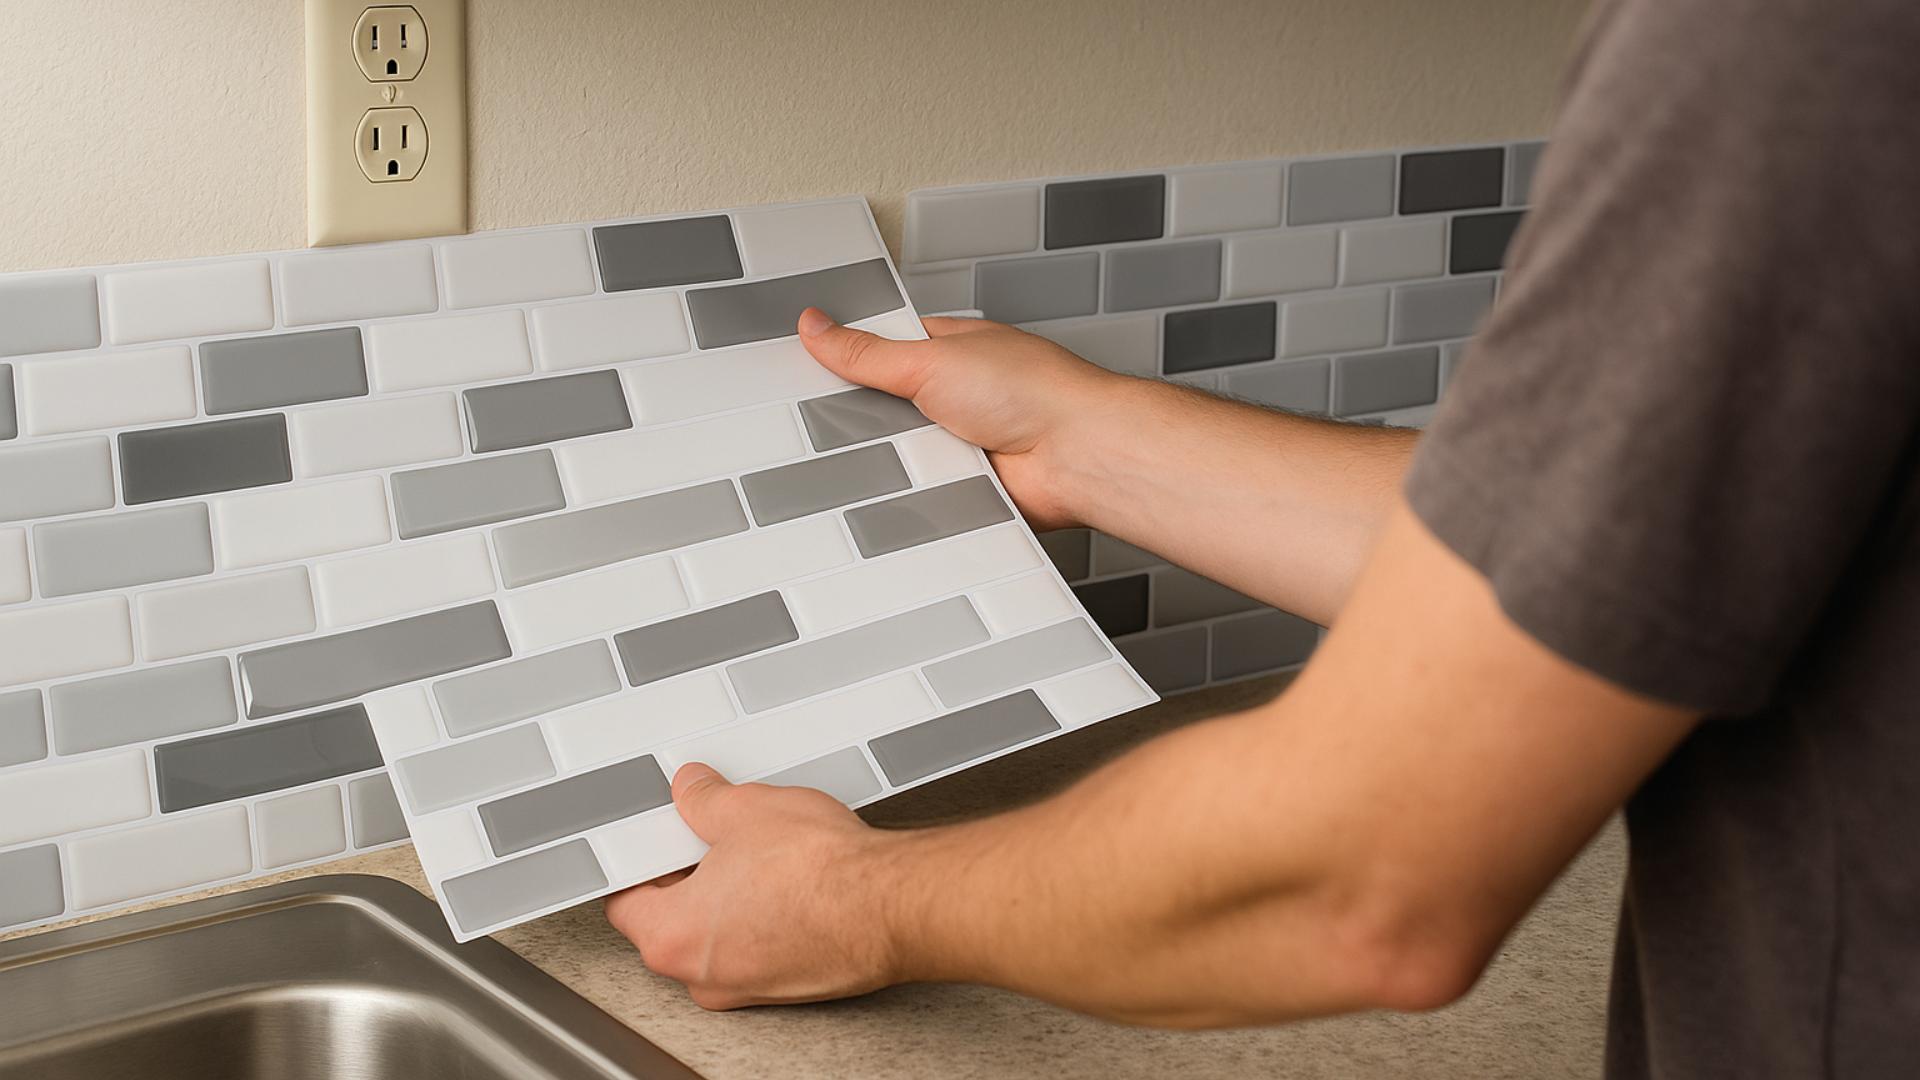
3. Peel and Stick Carefully:
Gently peel the backing off each tile, taking care not to touch the adhesive as much as possible. Position the tile against the wall’s surface and press firmly.
4. Cut with Precision:
For areas where whole tiles won’t fit, use a sharp utility knife or tile cutter to make precise cuts. A ruler or level will help ensure straight edges.
5. Apply Consistent Pressure:
Once a tile is in place, apply even pressure across the entire tile to achieve maximum adhesion. A roller can be a helpful tool for this step.
Every tile tells part of your kitchen’s story, and each should be placed with care to ensure a flawless finish.
Finishing Touches and Maintenance
With tiles installed, all that remains are the finishing touches and setting up a maintenance routine to keep your backsplash looking pristine.
1. Edge Trims:
Consider installing edge trims to give a clean, professional finish to the borders of your backsplash. They offer a polished look and protect tile edges from wear and tear.
2. Check for Air Bubbles:
Inspect your tiles for any air bubbles. If found, gently smooth them out using a flat object like a credit card.
3. Routine Cleaning:
Keep your new backsplash clean by wiping it regularly with a damp cloth. Avoid abrasive cleaners that may damage the tile finish.
4. Monitor for Loose Tiles:
Periodically inspect your tiles to ensure none have started to peel or detach. If you notice any loose tiles, apply additional pressure or a small amount of adhesive to secure them.
By keeping these tips in mind, you ensure your peel-and-stick backsplash remains a stunning feature in your kitchen for years to come.
With the installation of peel-and-stick tiles, you’ve not only transformed your kitchen’s aesthetic, but also made a substantial investment in your home’s value. The process is a testament to how modern, DIY solutions can achieve professional results. Whether you opted for classic white or a bold, intricate design, your new backsplash is a reflection of style and personal taste. As with any DIY endeavor, the satisfaction lies in the journey as much as the destination — a journey that has undoubtedly made your kitchen the heart of your home.
FAQ
What tools will I need to install a peel-and-stick backsplash?
To successfully install a peel-and-stick backsplash, you’ll require a utility knife, a measuring tape, a level, a pencil for marking, a straight edge, and a clean cloth for surface preparation.
How should I prepare the surface before applying the backsplash?
Begin by cleaning the wall surface thoroughly to remove any dust, grease, or grime. Ensure the wall is dry and smooth, as this will help the adhesive stick more effectively. If needed, lightly sand any uneven areas.
What is the best way to measure and cut the peel-and-stick tiles?
Start by measuring the area where the backsplash will be applied. Use a pencil to mark the dimensions on the tiles. For accurate cuts, employ a utility knife along a straight edge, ensuring you apply steady pressure for a clean cut.
How do I ensure the tiles are level when applying them?
Begin by marking a level horizontal line on the wall as a guide. Start applying the tiles from the center of the area or a prominent corner, following the guideline to maintain alignment and avoid any tilting.
What should I do if there are air bubbles after application?
If air bubbles form, gently lift the tile and reposition it. Smooth out the surface with a cloth or a squeegee, working from the center towards the edges to push out any trapped air.